In this article:
Integration with Mailchimp
1.1 Generate your Mailchimp API key
1.2 Audience Setting
1.3 Connect form elements to Mailchimp subscriber data.
1.1 Generate your Mailchimp API key
- Click HERE and find "API Keys" as follows. Click it.

Click "Create A Key"
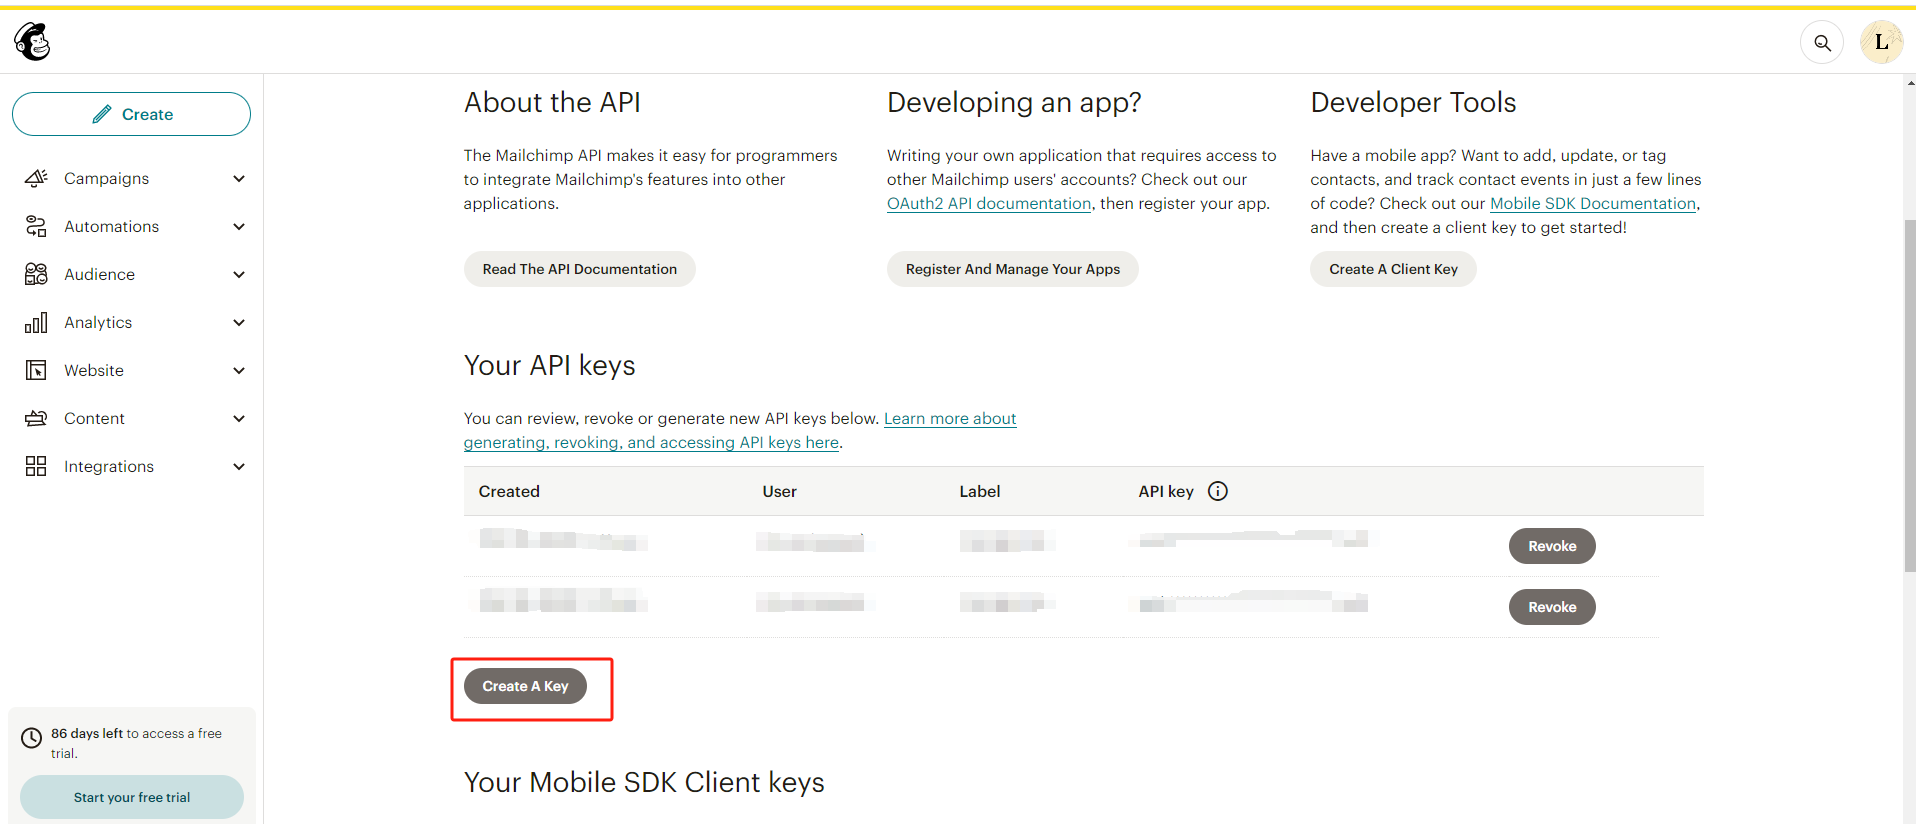
Generate "API Key Name". You can choose a descriptive name that easily remember, so you know which application uses that key.

Key generated done!

Copy the Mailchimp API Key to corresponding position and click "Connect".
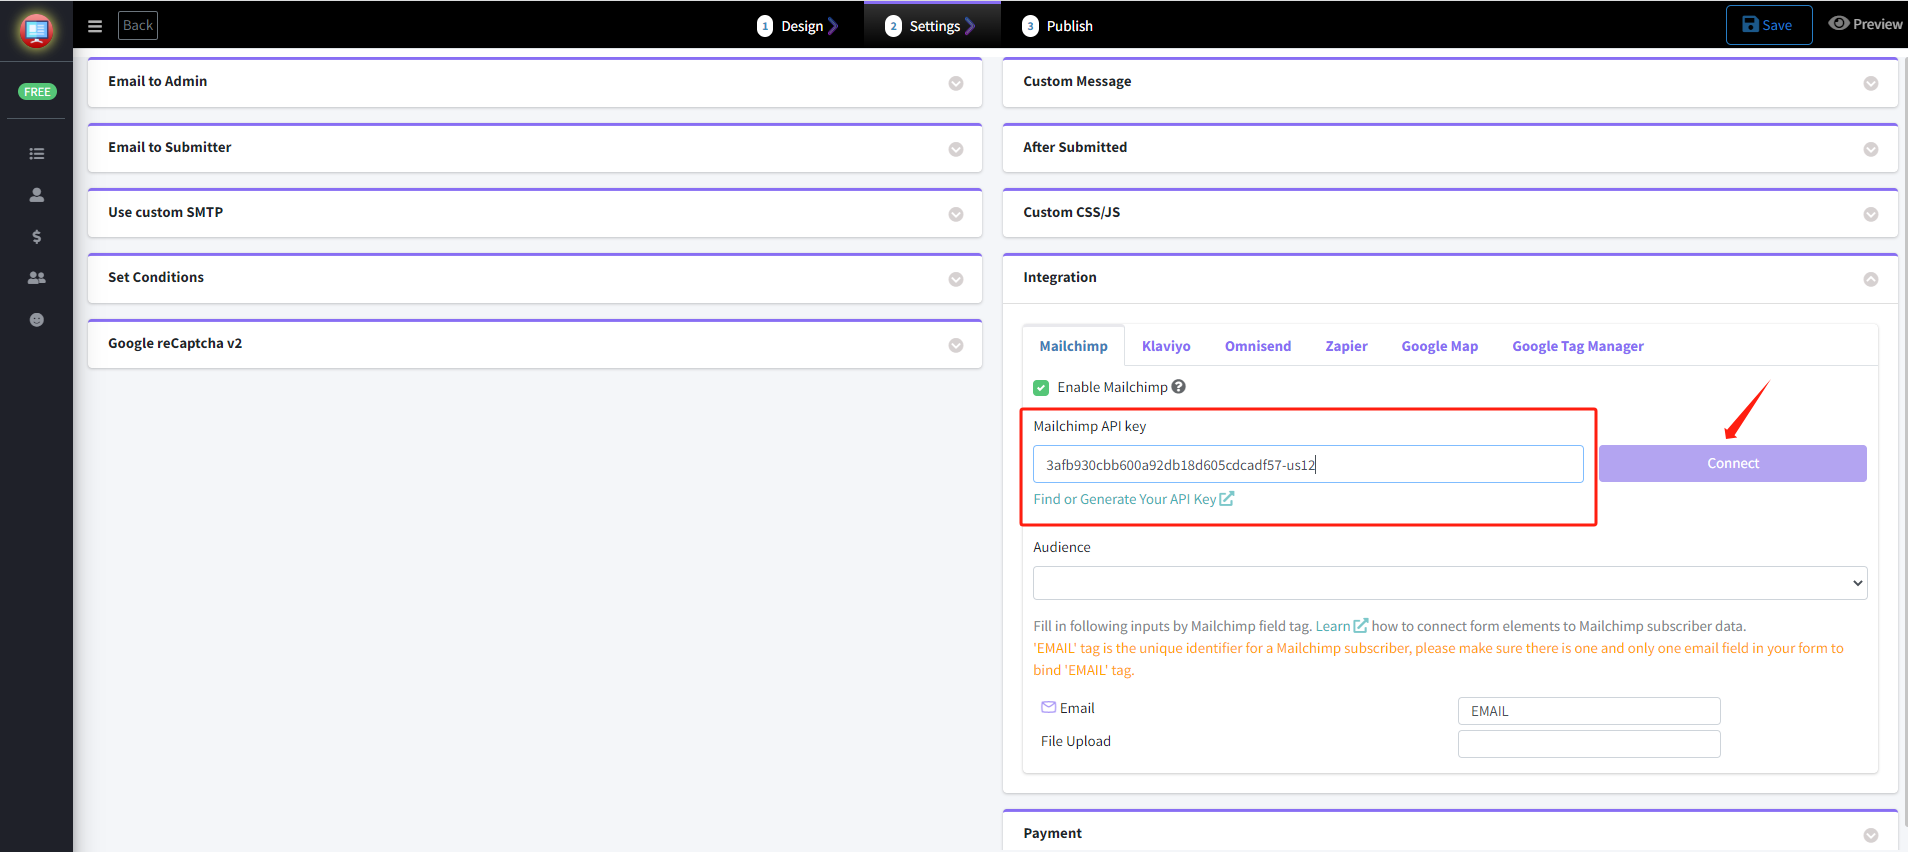
1.2 Audience Setting
After connected, choose the "Audience" you need.

- Next, return back to your Mailchimp. Find "Audience" - "Signup forms".

- Select "form builder" in "Signup forms".

1.3 Connect form elements to Mailchimp subscriber data.
- Select the form elements you need and get corresponding field tag.
Warm reminder:'EMAIL' tag is the unique identifier for a Mailchimp subscriber, please make sure there is one and only one email field in your form to bind 'EMAIL' tag.

- Copy the field tags and fill the corresponding Mailchimp Field tags in pifyapp form elements.

- Note: With group ADDRESS tag

- As you see, there are 6 input properties below but they are grouped in only one tag as ADDRESS
- ADDRESS[addr1]
- ADDRESS[addr2]
- ADDRESS[city]
- ADDRESS[state]
- ADDRESS[zip]
- ADDRESS[country]
Finally done! This is an example of an expected result when creating Mailchimp subscribe form.

- If you are using the Address Widget in your form. The Mailchimp Field tag could be ADDRESS.

